Home renos

The danger of a loose electrical outlet (and sloppy wiring)

September 8, 2018 Home renos ,

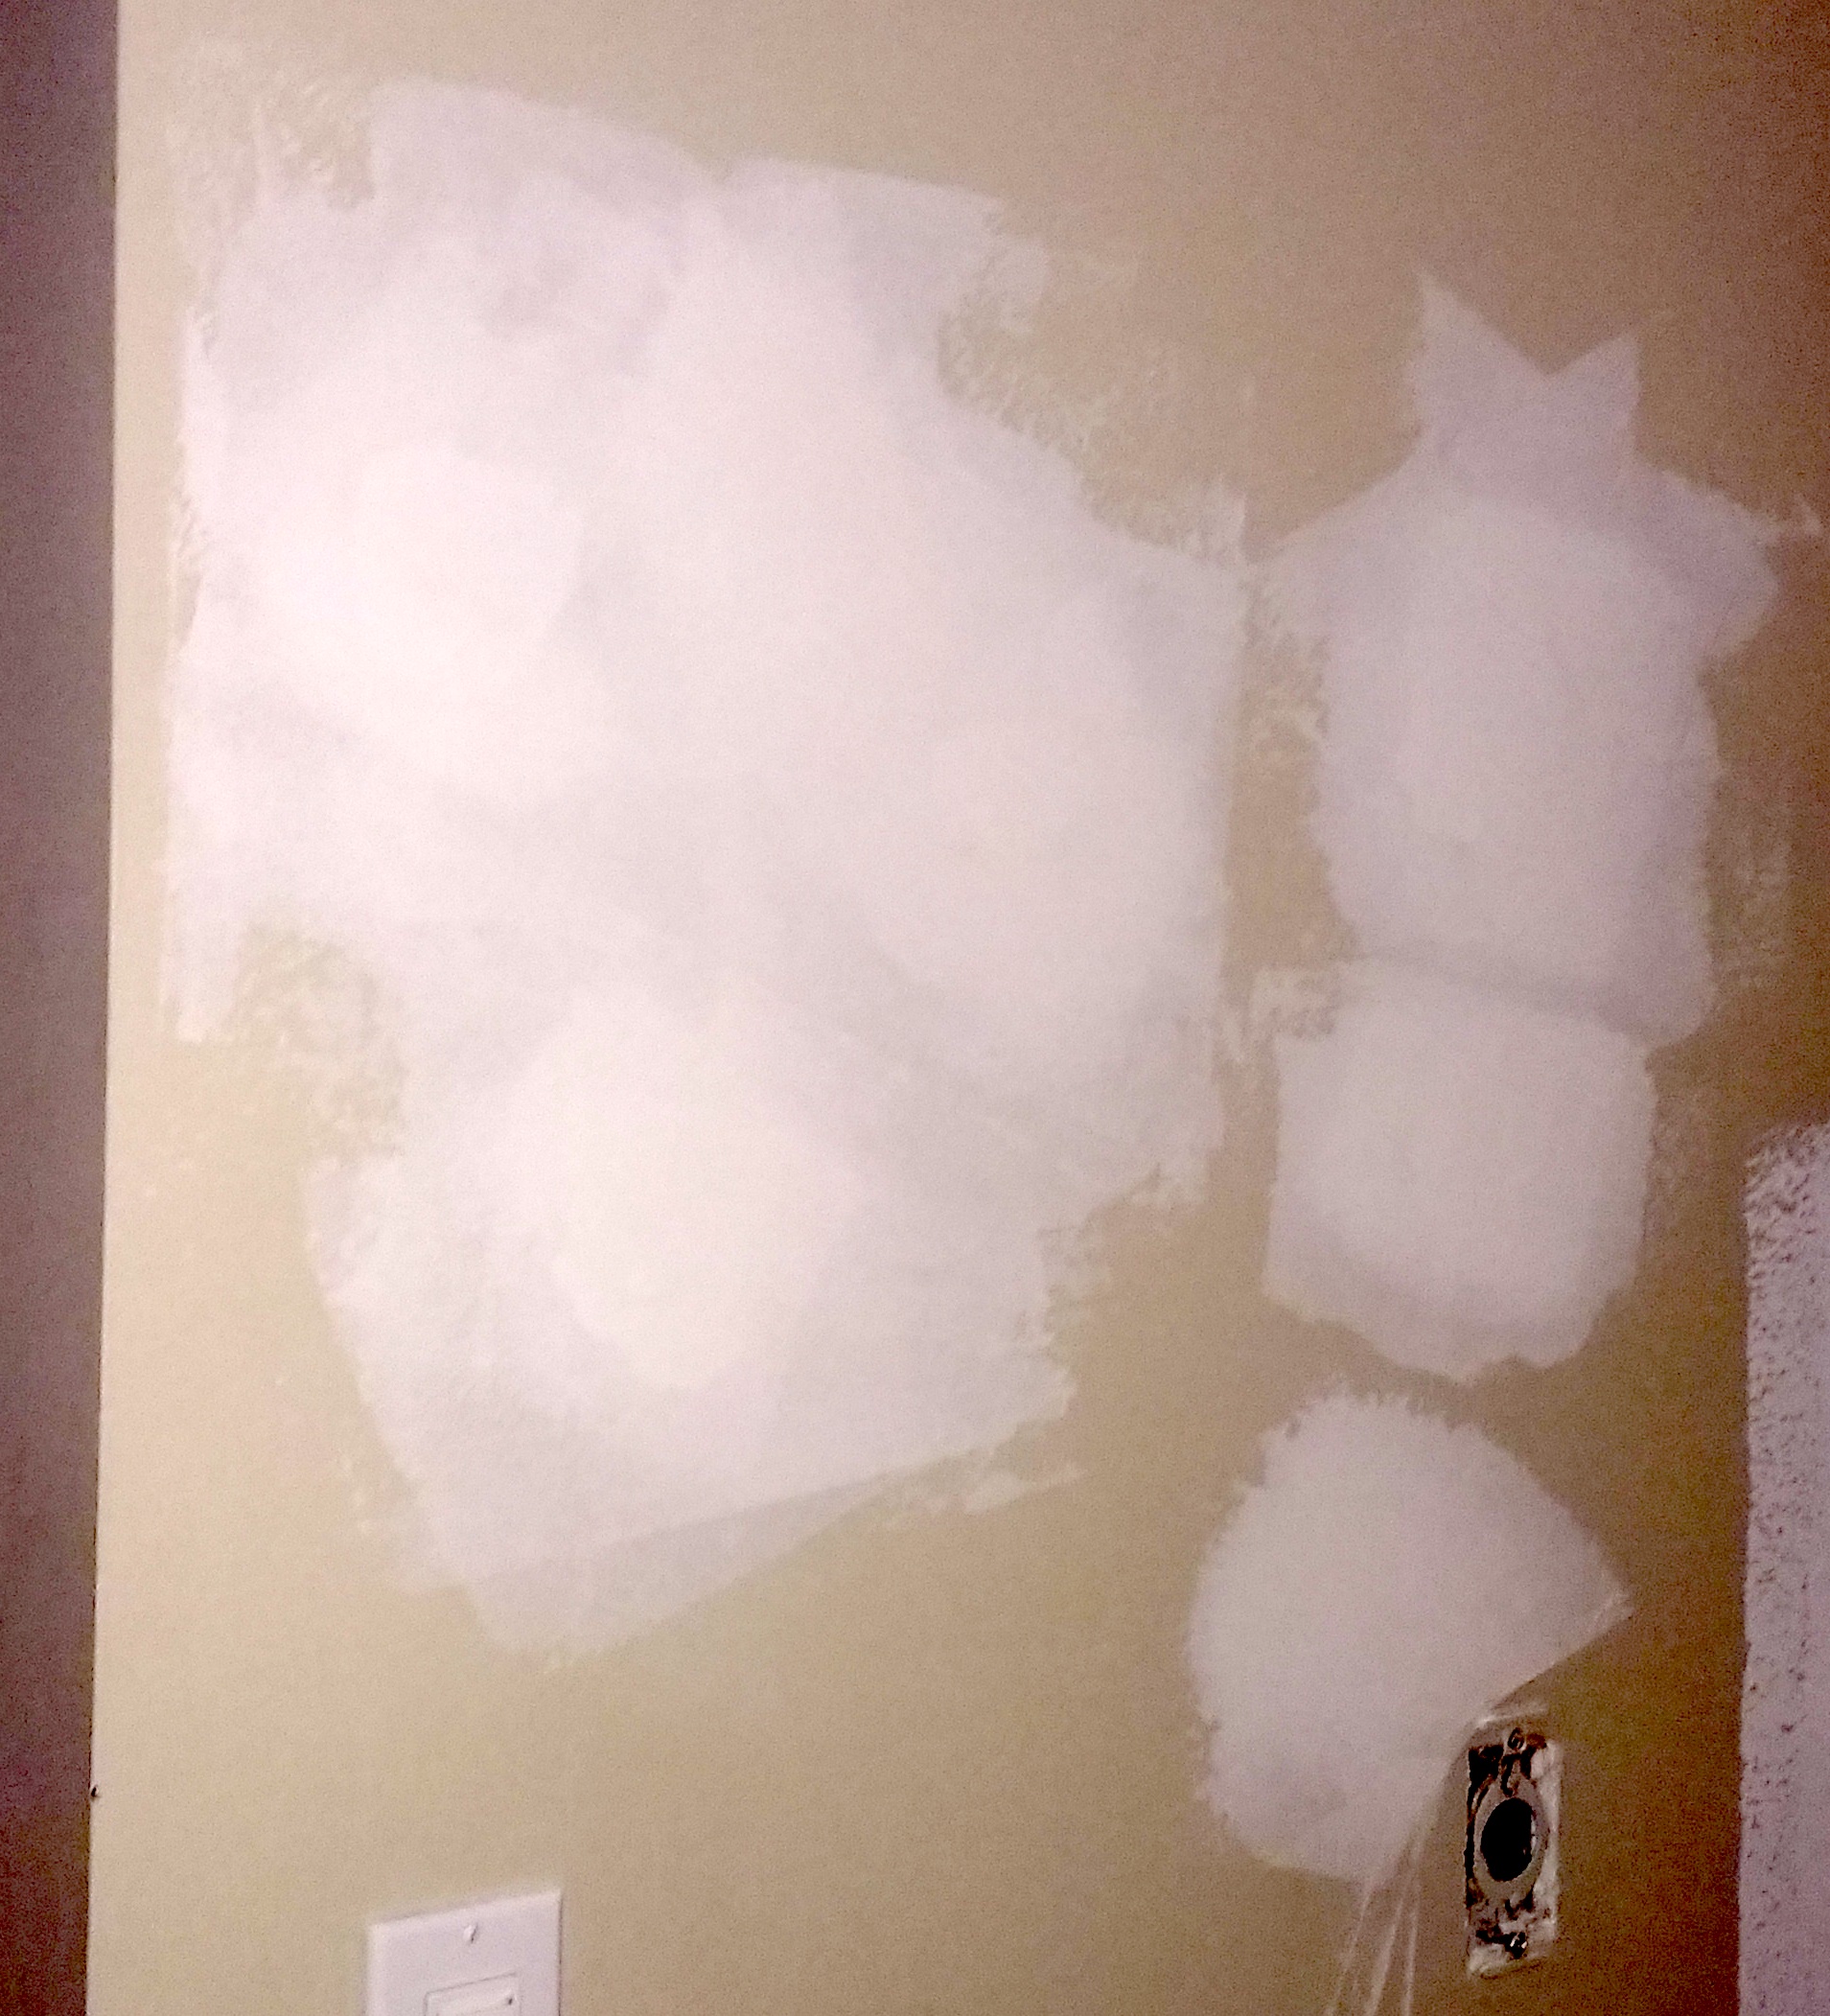
Check out this scorched electrical outlet and the inside of the cover plate:

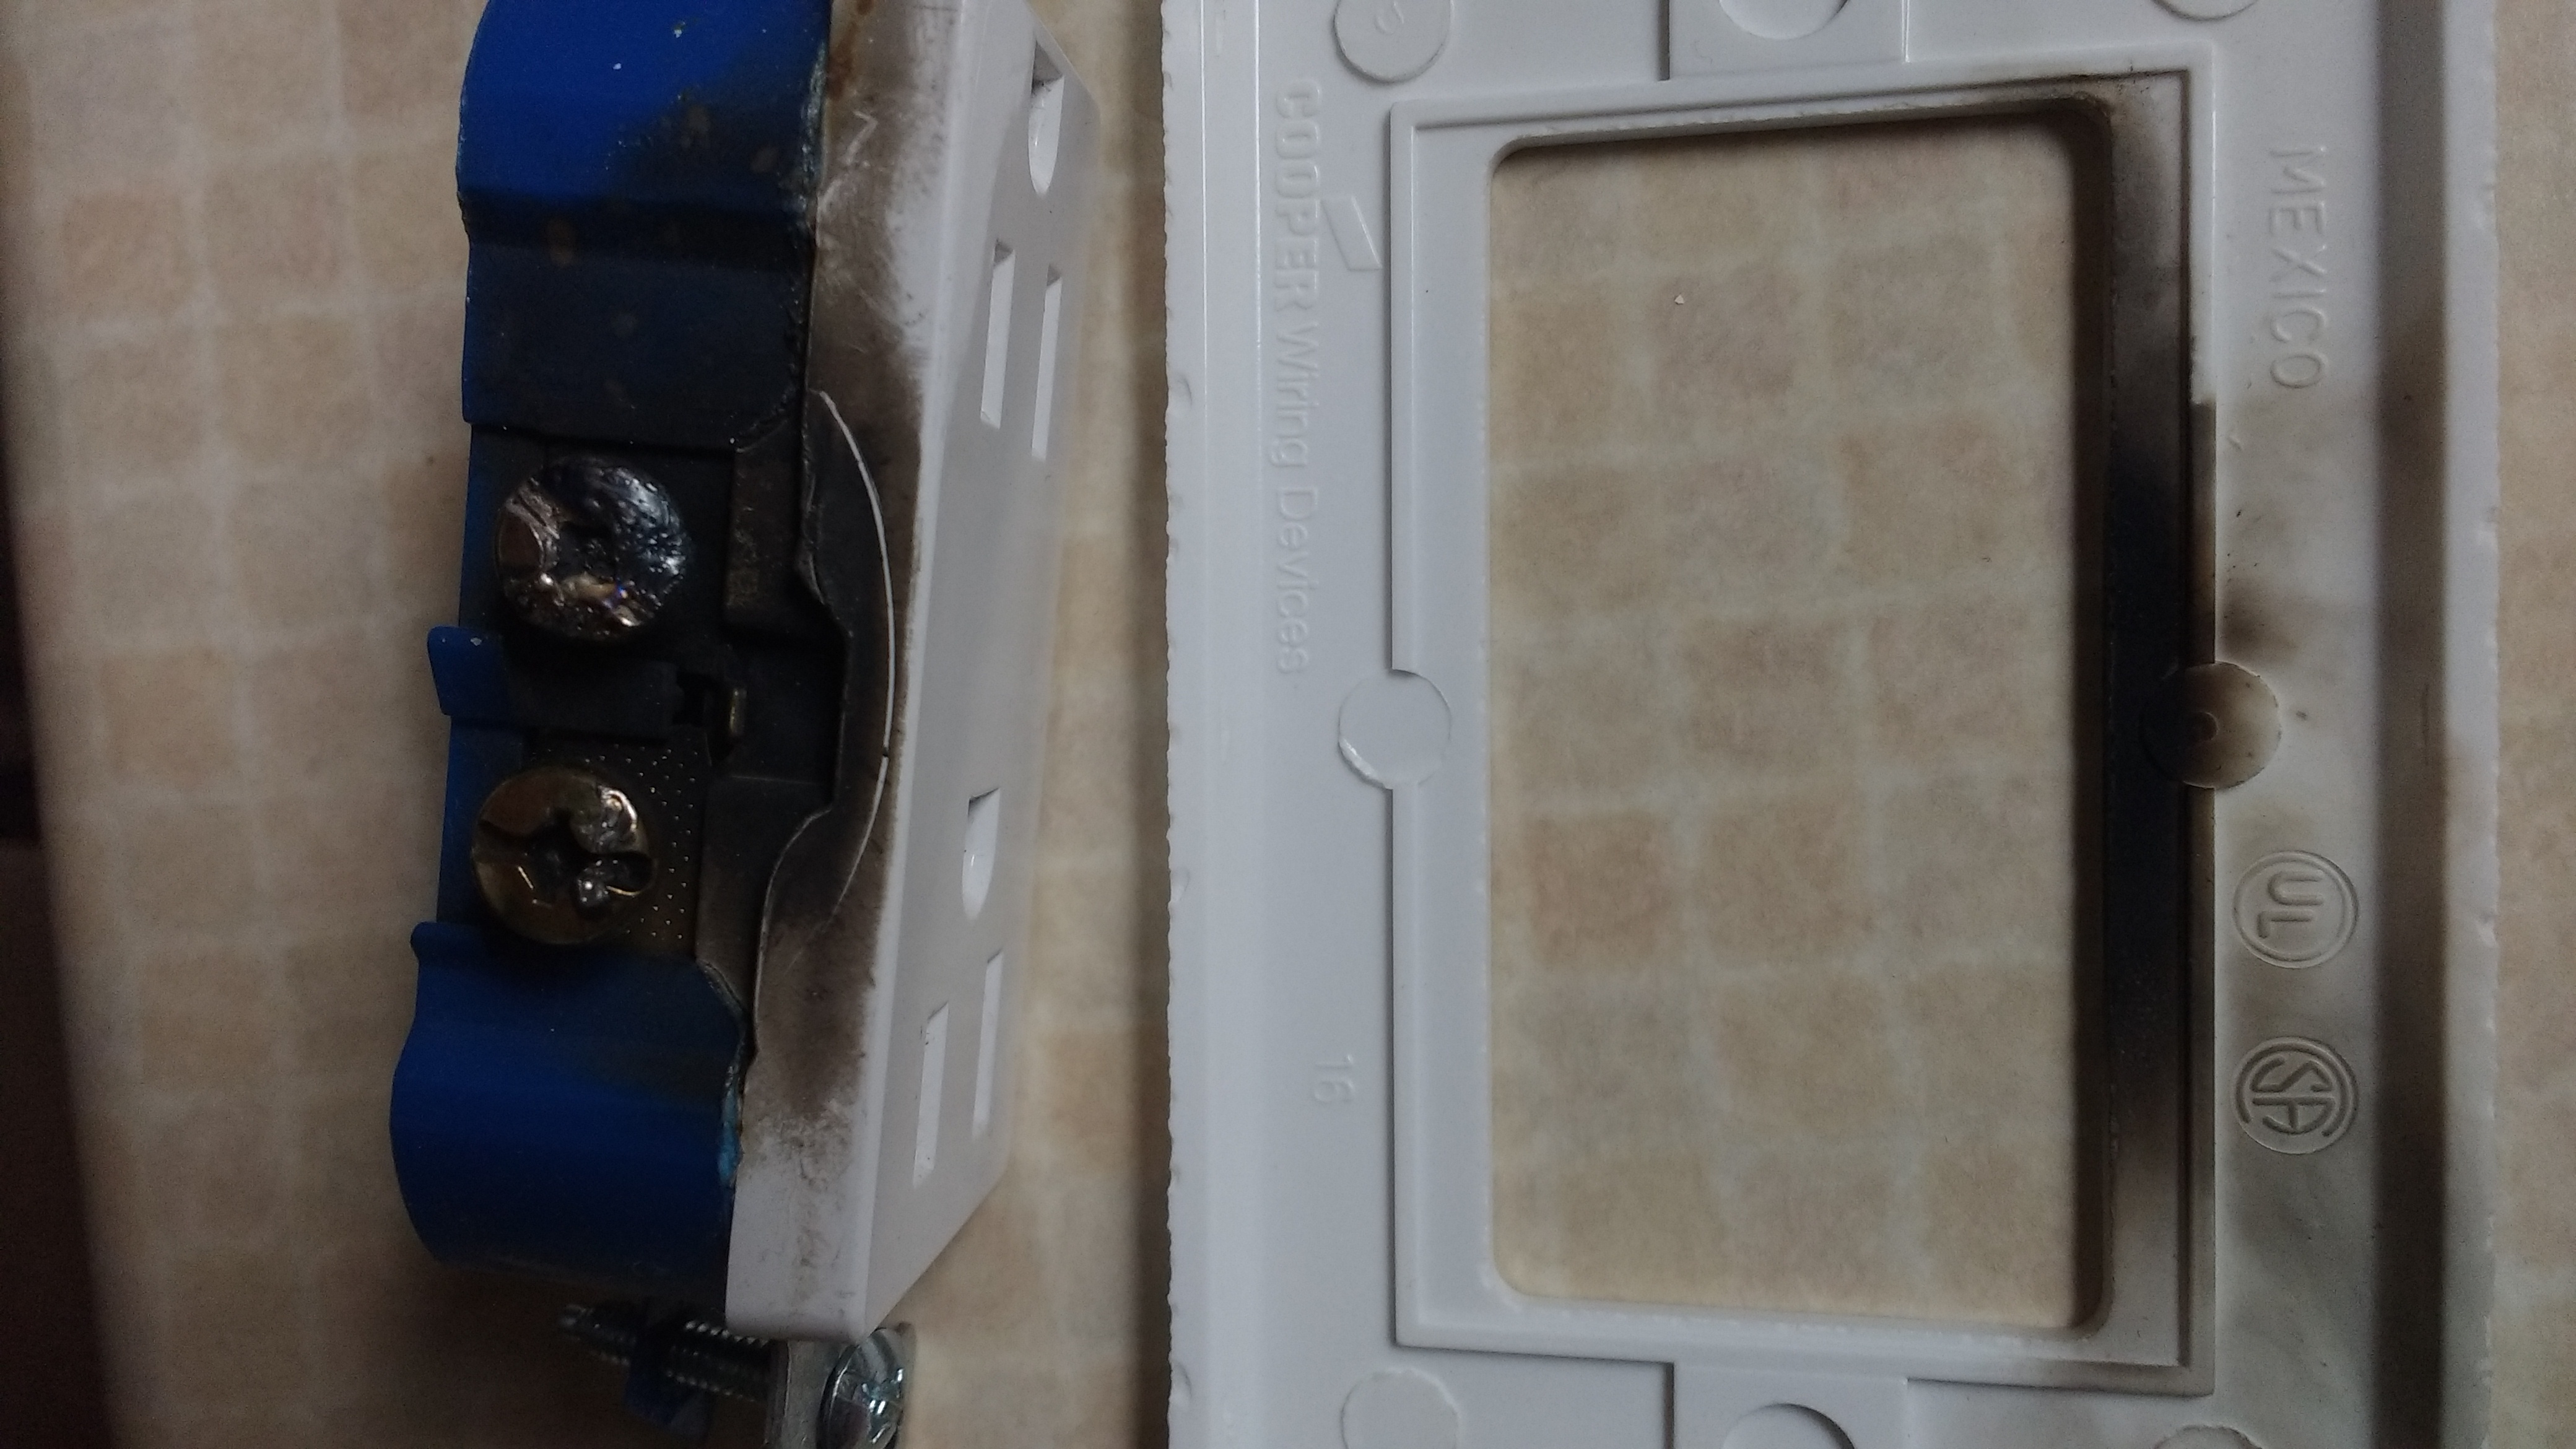
It’s a bit hard to see from this picture, but the screw is actually partially melted.  This happened when Sofia pulled her computer’s A/C adapter out of the wall, which resulted in a large spark, and that circuit blowing, leaving her in the dark.

I think this one is not actually the fault of the last owner of the house (who I won’t name, and who did lots of dangerous wiring), but was due to the effects of time, and a slightly lazy electrician.  The electrical box is slightly deformed pushing it on the right towards the hot screws of the outlet, and the outlet was wired up with the “quick wire” method, with the wires plugged directly into the back of the outlet, not using the screws on the sides.  Unfortunately, the hot screws were left sticking out fully (although the neutrals were screwed in nice and tight).  In the thirty years since the house was built, I think the outlet loosened enough that the furthest out hot screw touched the outlet box when the outlet was moved slightly pulling out the cord.  This shorted it nicely (scaring the hell out of Sofia), and toasting the outlet nicely.  Needless to say, I did not try to recycle this one, and it’s going in the trash.

There’s another loose outlet on the first floor that I’ve been meaning to fix.  I’m definitely going to get that opened up soon, and tighten it up — seeing the giant scorch marks on this one really highlights how dangerous that could be.

The original owner of my house didn’t like grounding circuits?!!

August 27, 2018 Home renos , ,

Each time I open an electrical outlet in my house that looks like it wasn’t original, I expect to be horrified. The original owner of my house did some very sloppy wiring. I had dangling wires all over the basement (he hid those with a drop ceiling), but I was able to tidy up without too much trouble.  He also seemed to have a general aversion to physically connecting any ground wires.  I found another example of this when I took off the old bathroom light:

Notice how there’s no ground wire attached to this box. It was even more mysterious before I starting trying to cut into the drywall beside the outlet, which was exploratory. I wanted to see if the ground wire had been cut before it was fed into the box. I was also curious about the non-standard electrical connector (i.e. it’s not a clamp) that had been used to feed the wire through.

What I found was another electrical box that was plastered over, which I believe is an Ontario electrical code violation. Here’s what it looked like after I took off the cover plate:

The wire that was fed into the box that the bathroom light was connected to passed through a piece of gas fitting pipe, which was loosely connected with a pair of twisty nuts (one removed in the picture above). I suppose that there was some ground connection of the secondary box through the gas-fitting pipe, but it wasn’t in very securely, and isn’t what I’d want to protect my house from catching on fire due to bad electrical wiring.

Incidentally, that secondary box wasn’t physically connected to a stud at all. What held it in place was:

  1. The loosely connected gas fitting pipe.
  2. Plaster.
  3. Kleenex or toilet paper that had been jammed into the hole, against the side of the box like so:

The Kleenex had some drywall compound on it, and it was that combination of drywall compound, Kleenex, and the loose gas fitting pipe that was supporting the light. Needless to say, that light sagged a bit, but I hadn’t gotten to handling it until now.

We now have a light that is properly grounded, and physically connected to the original wiring box:

I haven’t actually filled in the hole left by removing the secondary octagon box yet, and have temporarily installed the light in the bathroom so the space is usable. I thought I was almost finished the patching in the bathroom, but now have some more to do.

Misc home improvement progress.

August 8, 2018 Home renos , , ,

I’ve now got all but a very light skim coat left in my office (plus some sanding and priming), and then I’ll be ready to paint.  This spot had 6 really really bad patches from the old home owner:

He patched with some sort of gummy crap, and it left a visible mess.  I had to scrape all his patches off completely (in other places around the house too), and patch from scratch.  This left a mess, as the gummy patch compound he used ripped off the surface of the drywall in a few places, but it’s now almost done.

The office walls are now officially more patches than anything else:

Here you can see the patch from taking out the ancient intercom system, as well as an ancient unused electrical box that once had security system wiring in it.  Here’s a view of the home office

The big giant patch at the back was where the old home owner made his (very badly insulated) cutout into the garage for a CRT TV.  It’s now skim coated, sanded and primed.  The office is really dusty from that sanding, so I need to vacuum thoroughly.

I also got the outlet in the master bedroom sanded and primed today:

That’s where the ancient ceiling fan controller (and something else) used to be.  I consolidated that down to one box, and rerouted some of the electrical.  I had to put something there, and we now have a somewhat strange outlet up on the wall, but that actually worked well for a TV plug when we had a TV in the bedroom (we gave it away, but will eventually get a new one).

And finally, the bathroom is ready for the tile guys, with the casing on the window frame now installed.  Tile is going to run up the wall under it (and one the sides a little bit up the wall around the frame) :

It was nice to have an excuse to use my compressor.  It wasn’t a virgin, but was pretty close.

Moving an electrical outlet 4″ up in the bathroom.

August 5, 2018 Home renos

We are putting in a freestanding bathtub in our bathroom, and are having the tile run up the wall up to 42″. Unfortunately the bottom of the countertop electrical outlet was sitting there at about 40″. When I pointed this out to the tile guy, he suggested that I try to move it, either up or down (but preferably up).

Unfortunately, I’d already done all my drywall repairs on the sink side of the shower (as I’d removed the ugly medicine cabinet), so I really wasn’t looking forward to this task. It would have been so easy when I had the wall all open!

I vaguely remembered that there was slack in the electrical lines, and that I’d tidied up that wire with an electrical staple when I rebuilt the shower stall, so I thought I’d be able to move it up. I opened things up, being very careful in my removal of the box to not nick any wires, and found out that there was enough slack available that I could move the box up:

A bit of strapping and I had rough drywall back in place, and a first coat of mud on:

The almost finished (I need a final skim coat to smooth out some rough bits before sanding and priming) product looks pretty good:

Some progress prepping the bathroom reno.

June 18, 2018 Home renos , , ,

We are finally renovating our master bathroom. We’ve hired the guys from Markham Tile to do the plumbing and tile work (especially in the shower, which I was afraid to do). They don’t do the drywall part of the job, and left me some floor repairs as well. Here’s where the plumbing was done for the new tub:

In this picture, I’ve started installing some 2×4 “strapping” to support the replacement floor boards. I also ended expanding the holes a bit so that I could fit in pieces that used the joists to hold things up. Here’s things with all the puzzle pieces installed:

Over where the sink will be, I also had a mess to deal with:

I ended up expanding that hole a bit too, mostly to make a rectangular hole that would be easier to patch. I also installed some 2×4 “strapping” in this hole for extra support:

The final installed floor patch looks like:

With flooring in place, after a lot of tidy up, and installation of a small bump-out around some pipe that couldn’t be moved, I was ready to start throwing around some mud. Here’s the pre-mud view:

and by the sink:

This view shows where the medicine cabinet used to be. We removed it so that the shower head could be in a less awkward spot (it’s now centered in the shower). Unfortunately, moving the shower head and control left me some shower board repair to do. Here’s a pre-mud view of the shower where I’m doing the repair:

We opted not to install the “toe tester” in this shower rebuild since we were adjusting the plumbing anyways.

Here’s the bathtub area after an initial rough layup of mud:

and the shower board repair:

and a really badly lit shot of the sink area:

Tomorrow I lay up a bit more mud.